

Hello, if you have ever wondered: how can I create a website, do I need to hire someone, will it cost me thousands of dollars?
The answer is that it’s really easy to make a website!, and no, it’s not going to cost you a lot of money. So if you follow along with this guide, you’ll be able to create a website like this:

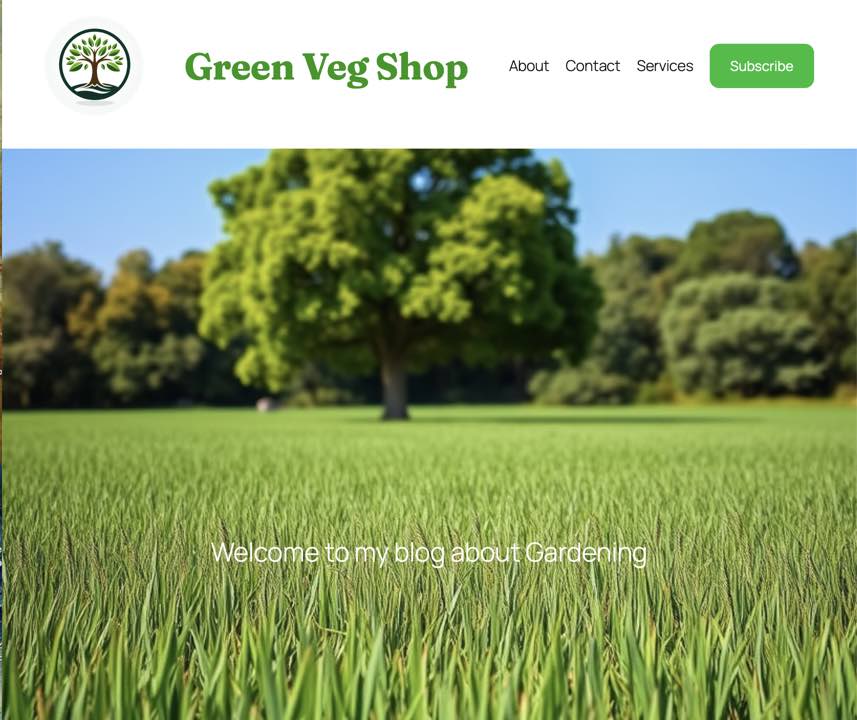
Of course, it is just an example; it’s built upon an idea of a website about gardening and gardening services. But this is just to show you that you can create a nice website, with a responsive design, which means that it displays perfectly also on mobile – and you know that today most of online traffic is from smartphones:

Let’s begin!
What does it take to create a website?
1 – The Domain name
So, the first thing to do is to choose the name of your website, which is called the domain name. There are two big issues regarding the domain:
1) The first is choosing the name itself: it is better to choose a name that is short and memorable. It should sound good, or at least okay. It should also look good when you read it written on paper or in the browser address bar. So my advice is try to write it without spaces, especially if it is a compound name: often things look strange when words are attached one another.
2) The second issue is the availability, because if someone else already bought the domain name, you can’t buy it. It’s theirs, and you have to choose another name, or at least the name under a different extension. If the .com extension is already taken, you can choose another one, like .org or other available extensions. But it’s usually better to use a totally different name.
Here’s a sum up of some key aspects when deciding for a domain name:
- Keep it short – Aim for 14 characters or fewer, if possible.
- Use .com if available – It’s the most trusted, though other extensions are growing.
- Make it easy to say, spell, and remember – Say it out loud, imagine it in conversation, emails, and print.
- Avoid symbols – Skip numbers and hyphens to reduce confusion.
- Explore options – Try variations, give it time, and choose what feels right for your “brand”.
2 – A hosting
You also need the physical space where the website is stored, and it’s called the hosting. Note that once upon a time, not so many years ago, people used to host their websites on their computers, which needed to be always online in order for their website to be accessible to other users. But now this time has gone, and websites are hosted on servers, which are specialized big computers. There are many companies online that offer hosting solutions of all kinds.
3 – The software / website itself
And number three, you need the actual website itself. And once again, some years ago, the websites were built mostly in HTML. People would compile their own website, and upload it onto the hosting (or self host it on their home computer / server).
But now websites are mostly created with dedicated software, like WordPress.org, which is technically free, is an open-source software. WordPress.org is the software that runs almost 43% of all today’s world websites. You still have to upload it on a hosting space however.
Now, you can have all of these three components separate, the hosting, the domain name, and the software running the site… Or, a convenient solution is to have all of them in a bundle. And many companies offer that.
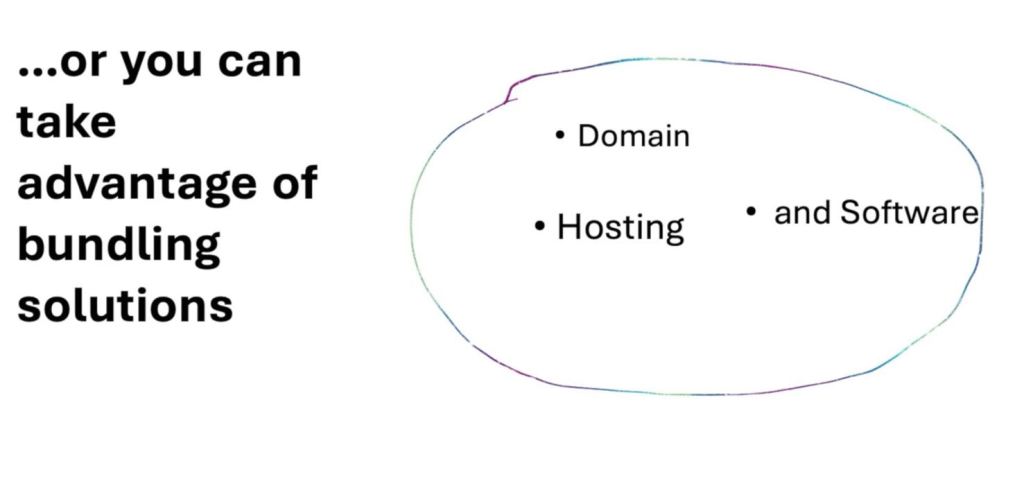
Convenient solutions: domain, hosting and software in a bundle
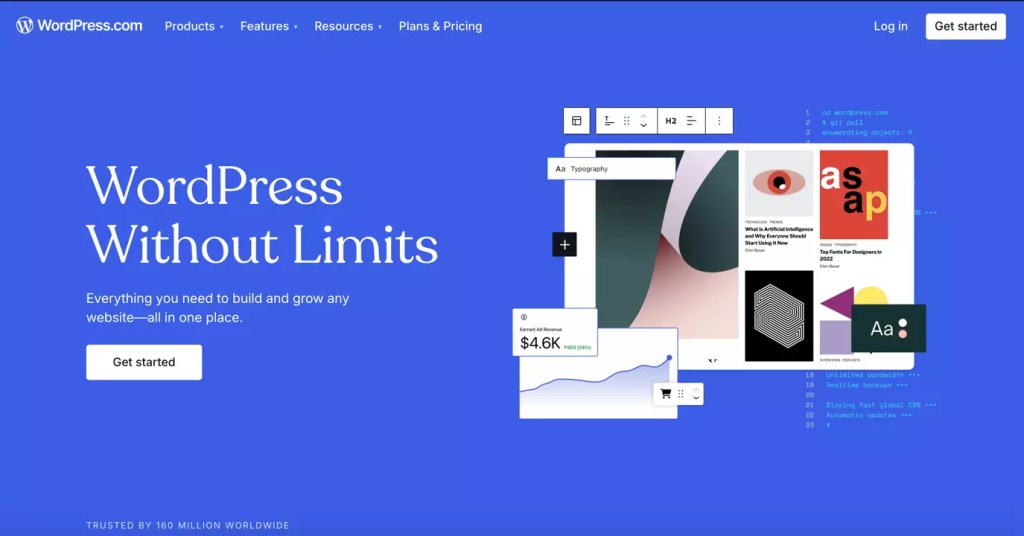
So I use for many of my projects a hosting service which is called WordPress.com, which is a great fully integrated solution. It’s very good for beginners and also very good to run a website without worrying too much about technical issues. WordPress.com offers a fully managed WordPress hosting, which means that they take care of all the technical aspects like backups and updates. Overall I find it very convenient, especially for beginners, or people who already run their business and don’t want to dedicate too much time to a website maintenance.
And the most important part is that WordPress.com uses the same WordPress.org software. The naming can be confusing, but it’s worth keeping in mind the difference. WordPress.com is a hosting company which was founded by a co-founder of WordPress.org.
And since they use the same underlying software, which is WordPress.org, this guide is universal, independent of any hosting company you choose: provided you decide to build your website with a version of WordPress.org software, this tutorial will apply correctly.
Start your website today with WordPress.com 🚀 Link & Instructions:
WordPress.com is the perfect platform to launch your website or personal blog in just minutes, backed by reliable and secure hosting. With annual plans, you’ll also get a free domain name for the first year, so you can begin building your online presence right away.
Here’s how to get started in 2 simple steps:
- Visit WordPress.com through this link to explore the different plans.
- Choose the plan that best fits your needs and start creating your site today.
Don’t wait – the best time to grow your online project is now.
Choosing a theme
So after you’ve chosen your domain, and the hosting plan according to your needs, usually a site builder lets you set a WordPress theme.
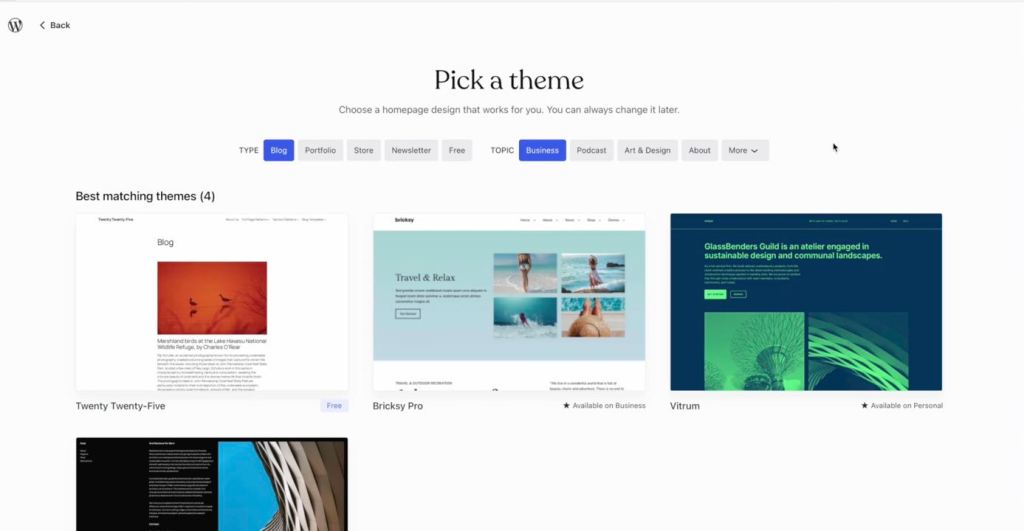
A WordPress theme can be described with a metaphor: it is a kind of dress for your website. It commands the overall appearance. Now, there are tons of themes, some free, some paid, and you can even create your own. Here in this guide, I will show you how easy it is to customize an existing free theme and give the appearance you desire to your website.
WordPress.org releases every year the default yearly theme, which is free. Here is the theme of the year, named “twenty twenty five”. We’ll use that, and now once you have installed the theme, it will have the standard appearance:
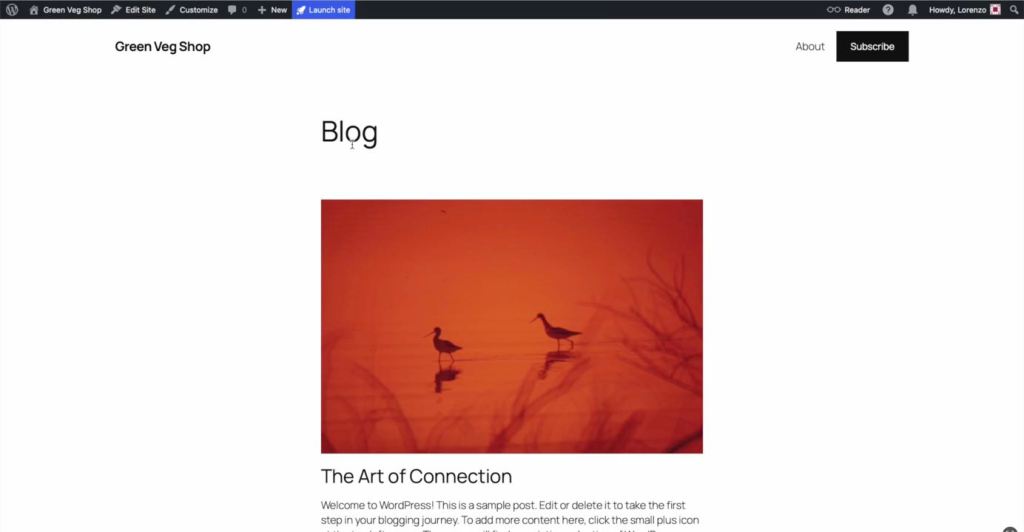
As you can see, there are some signpost content already made, just to see the overall appearance of a website. All we have to do now is to customize the structure and add your own content.
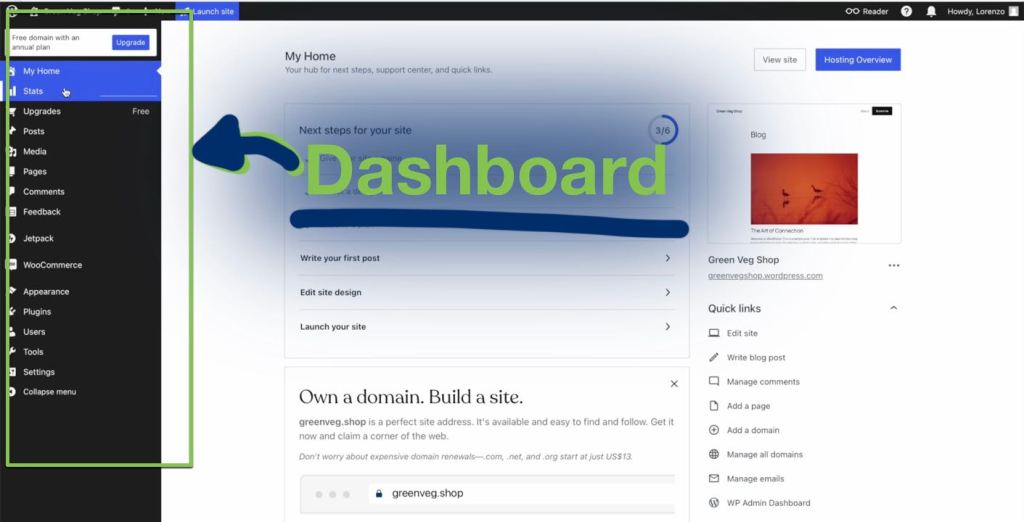
WordPress dashboard
We will familiarize ourselves with the WordPress dashboard first. This is the WordPress dashboard, which comes to all WordPress sites. Here you have all the controls for your website. You have many tabs on the left, for example, to view stats and also to create and access content, like posts, pages, and to modify the overall appearance:
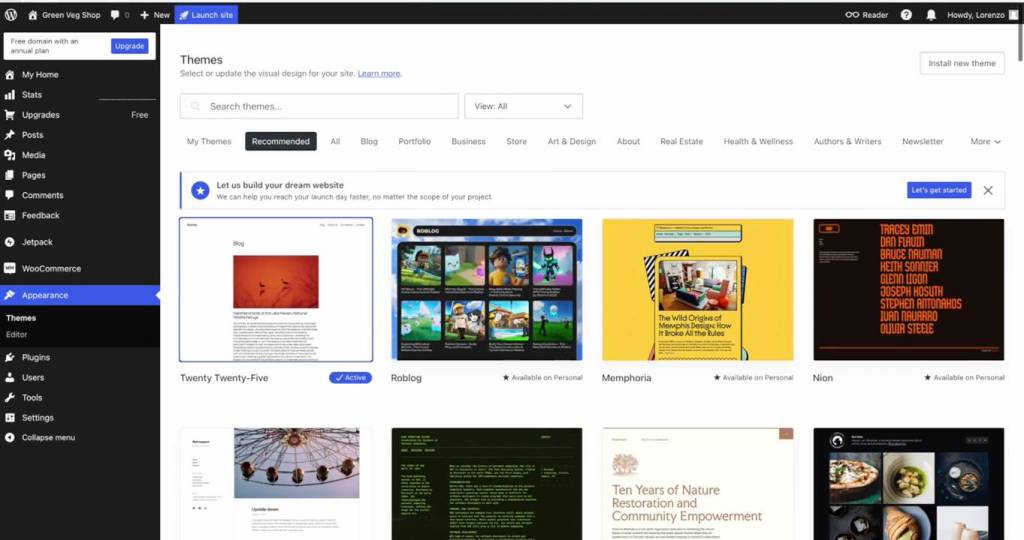
In particular, under the tab “Appearance” and “themes”, as you can see, you have all the library of themes, from free to paid ones. We have the default 2025 active theme, but of course, you can choose any theme you want.
OK, the default theme has this appearance, but note that under the tab “Appearance –> Editor”, you can access the editor to modify the appearance of your website. Note here in the editor the tab labeled “templates”. This will be fundamental in changing the appearance of your website.
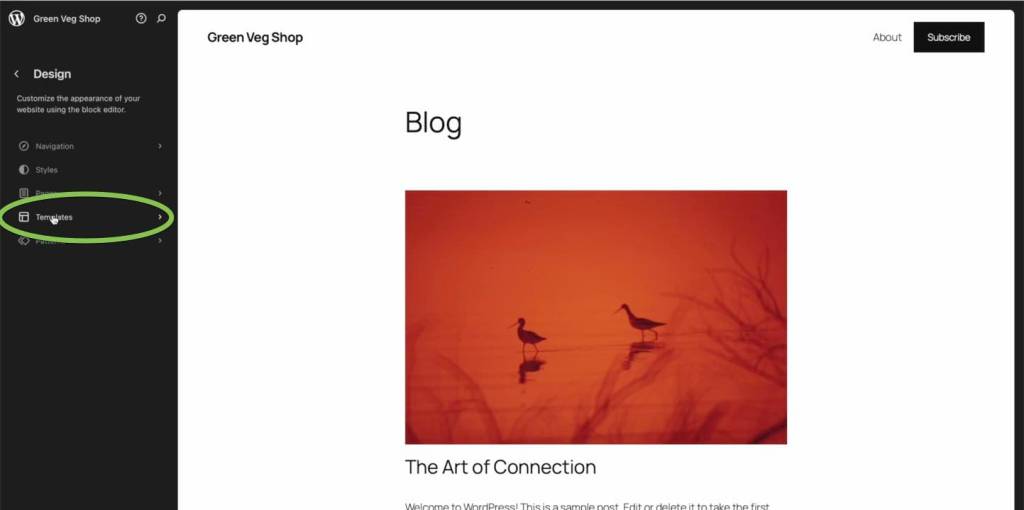
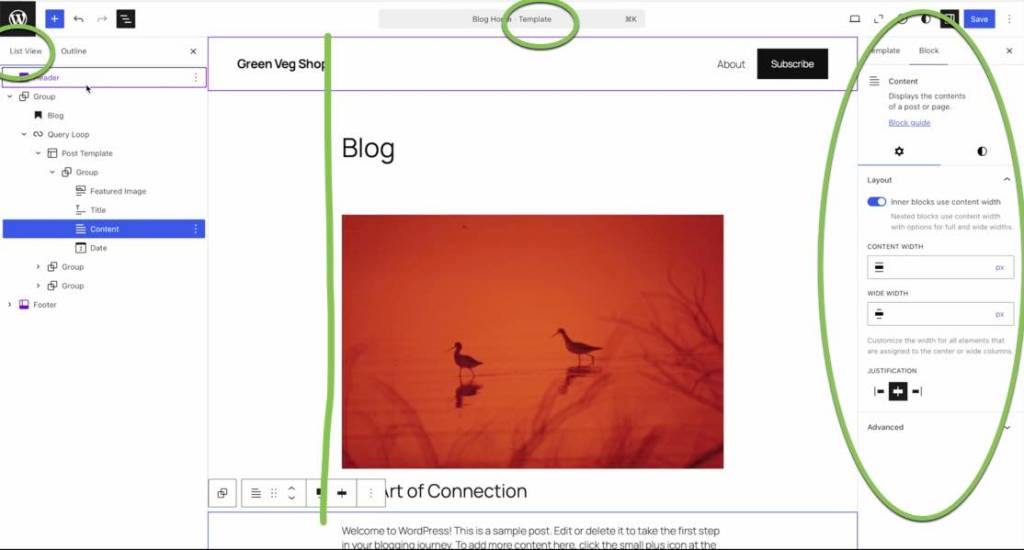
Click on “Template” tab. Then you’ll see a lot of templates. Each of them commands pages or post. Under each there is a label. For example, the default “blog home” template is the template which is applied by default to your website:

How do we know that? Well it’s a WordPress feature. If you go to “Settings” and “Reading”, note that your home page display is set with the option to display “your latest posts”:
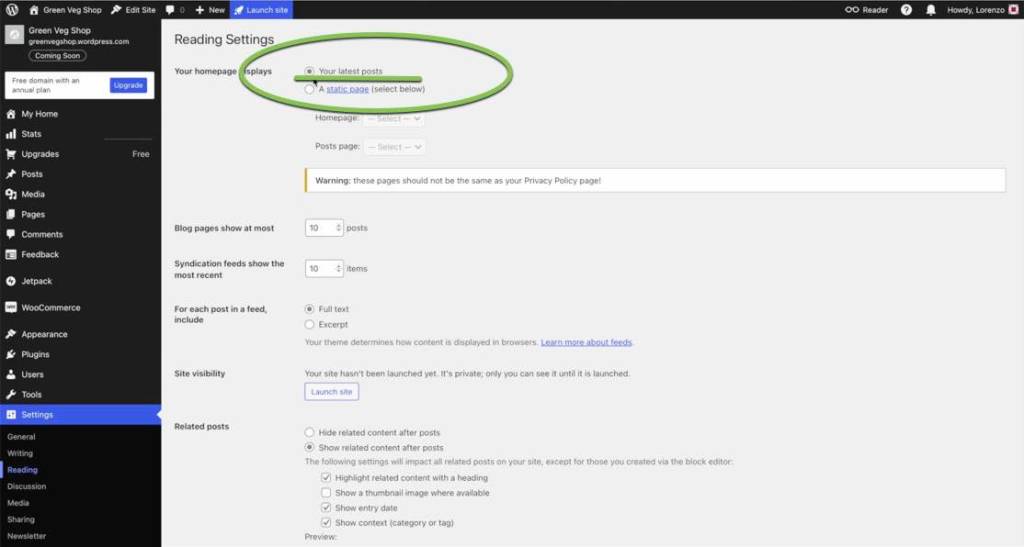
And this is the signal that the template used for the homepage of your website is the “blog home” template. And if you want to change the appearance of your website home page, this is the template that you will have to modify.
Another fast way to access the editor is to click on “edit site” on top of the bar that appears on your screen. Then click on “templates” and “Blog home”: in this way again you access the editor for this specific template (“blog home”), as you can see in the upper menu bar. Now editing a template means changing the underlying structure, not the content itself. More on that in a few minutes.
An overview of the “Block editor”
The block editor is very easy to use. It is the same whether you edit templates or if you write posts or insert content in a page.
At the center of the block editor, you have the structure; on the right, a tab for the “Settings”. And each part of the content is called a “block”.
You can access a list view on your left, which is a very convenient way to show each individual block, each individual part of the structure of your website. This is very convenient because it’s not always straightforward to select with your mouse the block you want to modify. But in the list view, you can easily select each block.
Notice that WordPress, in this case, WordPress.com, offers a very good integration with AI tools. I find it useful for generating images on the spot. Click on + anywhere when hovering in the content area, or type “/” and choose “Image”. You’ll be offered few options to upload images, choose from Media gallery, or create one with AI tools.

Learn the fundamental difference: templates, pages, and posts
Now, before we continue, it’s very important that you understand a few simple concepts that will greatly make your life really easy with WordPress. I’m talking about the difference between templates, pages, and posts.
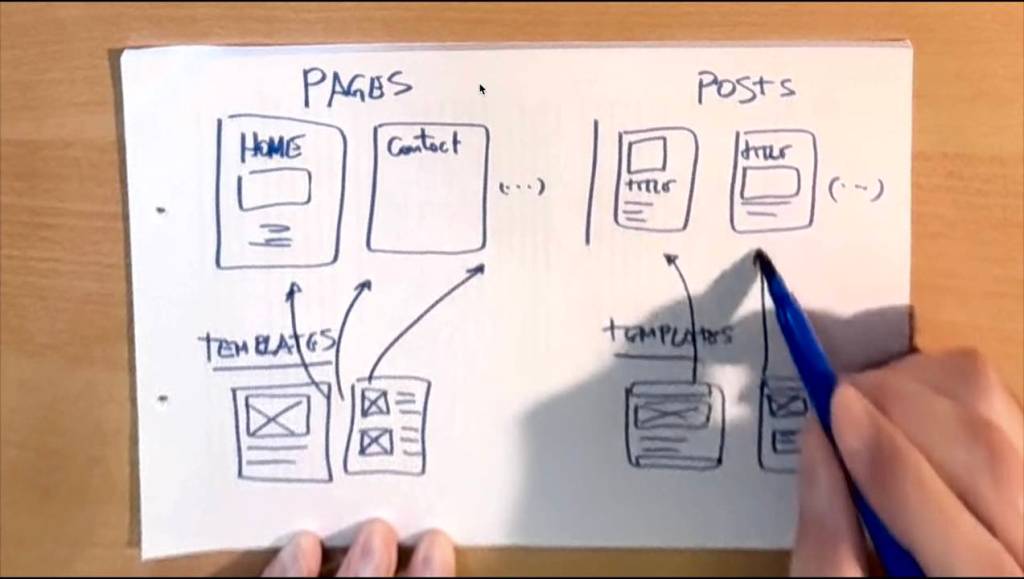
A template, as I already mentioned, is the underlying structure. It commands the appearance of your website. It’s in the template that you will make the changes that really customize the site as you want.
On the other hand, pages and posts are the places where the content will go. Pages are sometimes defined as static or fixed parts. And posts, as implied by the meaning of the name itself, are articles, a feed of content, news, etc.
Just to give a broad example, take a magazine, a paper magazine. A magazine, like a website, also has pages. And in those pages are arranged the articles, which is the equivalent of blog posts. Overall, pages and posts have their own structure. And this structure is the equivalent of the template. And it’s the underlying structure that makes the magazine unique.

So you have a structure, which is a template, and above posts and pages. You can create as many templates as you want for pages and posts with WordPress. And the content usually goes in pages and posts. While on templates, you should put only fixed content that you want to appear on every page or every post, commanded by that specific underlying template.
For example, if you want to insert a banner such as an advertisement on every post you write, you put it into the template. So that when you write a new post, you just write a new post with new content, but you already find the banner because it is in the underlying template for the posts.
Customize the home page template
Okay, now it’s time to modify the blog home template. As you can see, we are in the template editor, where the changes on your website take part.
We can insert the image generated with the AI, and just to give a nice look to your home page we will transform this image with the attribute of “cover” image:
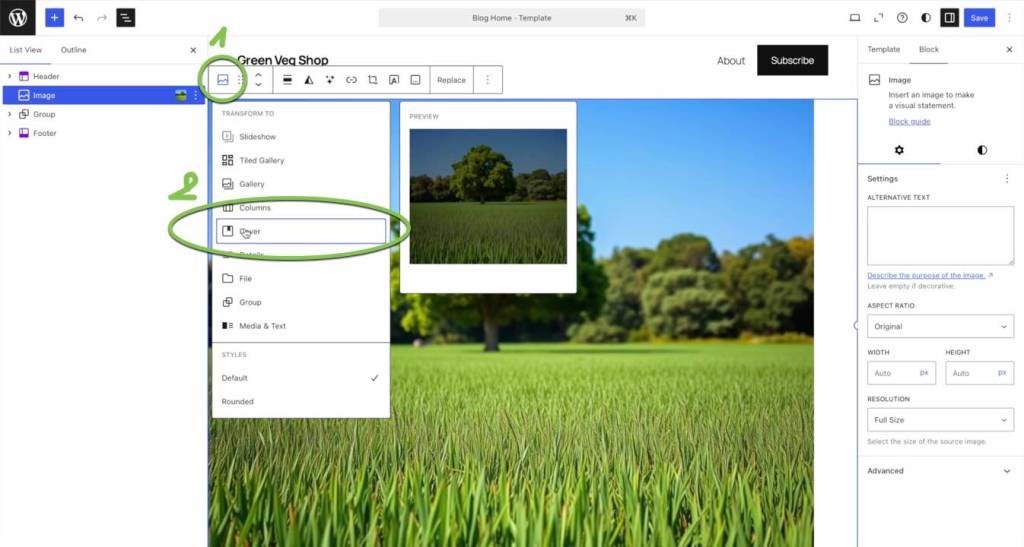
This lets us give the opportunity to use this nice scroll effect; just make sure to enable the fixed background setting (on the right panel, when you’ve selected the Cover block), and the full width of the image used for the cove:
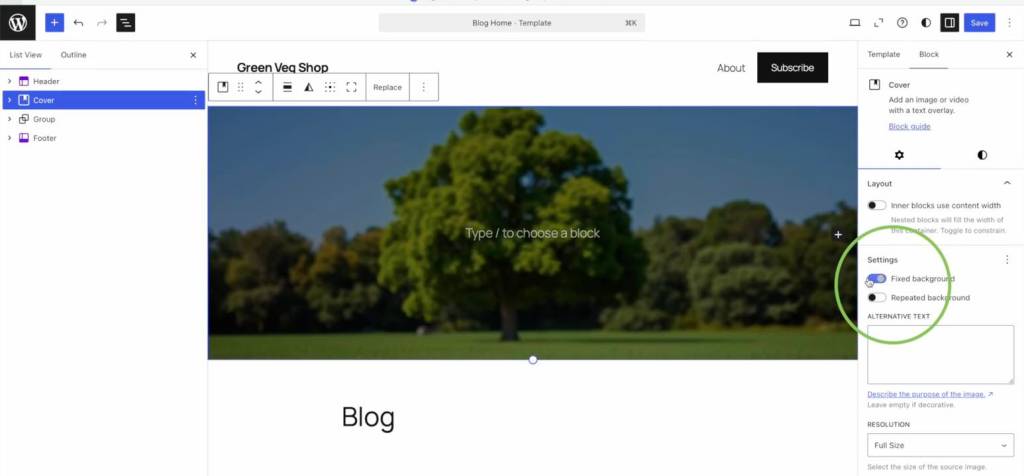
And in this way as you can see you can create this nice effect with just an image.
On a cover block you can also insert some text, which is very good for an introduction to your website.
WordPress is amazing because it is by default ready for mobile. It is responsive. Those themes are so-called responsive themes. So you can select the preview for mobile (on the upper right, there’s a drop down menu), and you can see a preview of how it looks on a smartphone.
Changing content disposition and editing the Header of the Home page
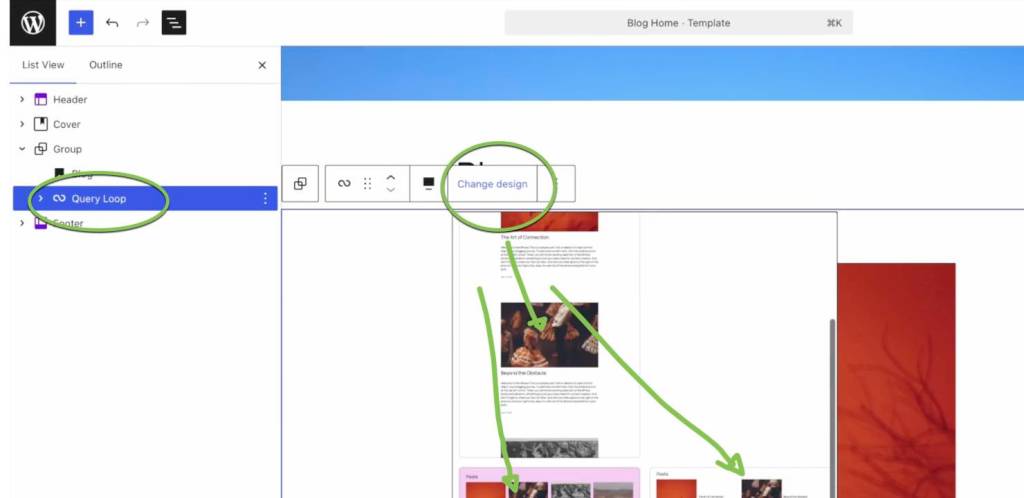
Now, see on the list view that you have some sections on this template: Header, content, and footer. Every page should have a header, some content, and a footer. The content here, as you can see, offers the view of the latest post in this template. You can, of course, put anything you want on the page, and if you decide to change the appearance of the post, for example, in this block, it’s easy to change the design. Let’s select first the Query Loop block (later on I’ll explain more about this relevant block), and then choose a convenient grid with the latest posts.
Later on, we will write our own content, of course. But this is just to see how easy it is to customize a template.
Okay, now it’s time to modify the header, which is a specific template part. See, usually, a header has the title of the website, maybe the logo, and a menu, which is called Navigation in WordPress.
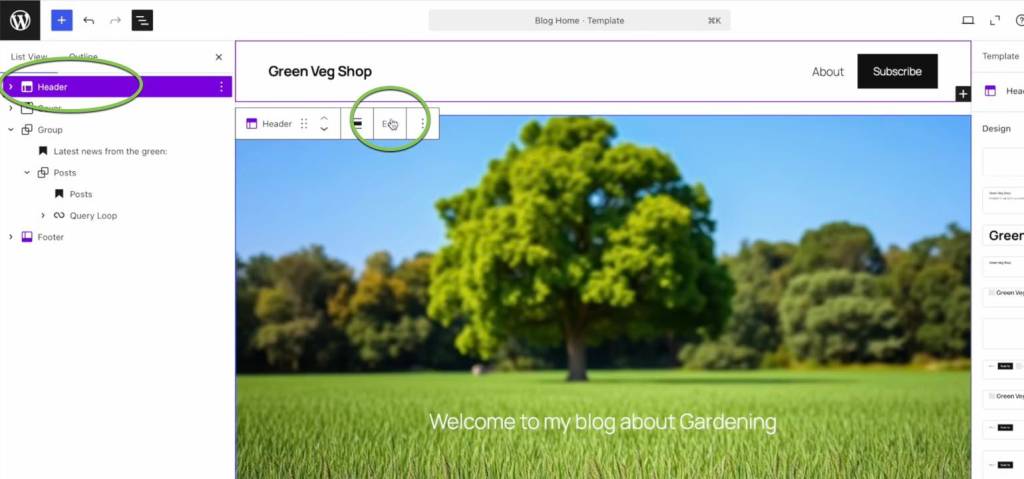
We will change the font and appearance, and we’ll make a logo, using conveniently some free AI tools.
Overall, the appearance begins to be quite nice:
Writing the first post
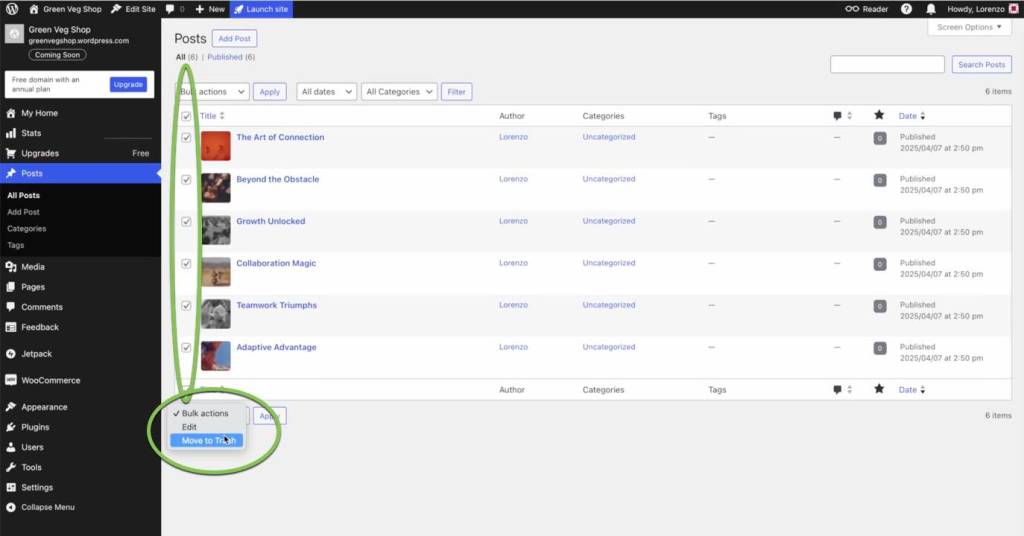
Now it’s time to write our own very first post. First, we will delete all the signpost content, which came with the default theme, and we will add the first post.
Go to the Posts tab in the Dashboard, and click on “Add post”, and you’ll enter the editor for the posts. Note that we are now creating content, we aren’t editing a template! The editor looks the same, but on top in the bar, you can see that we are in the Post editor.
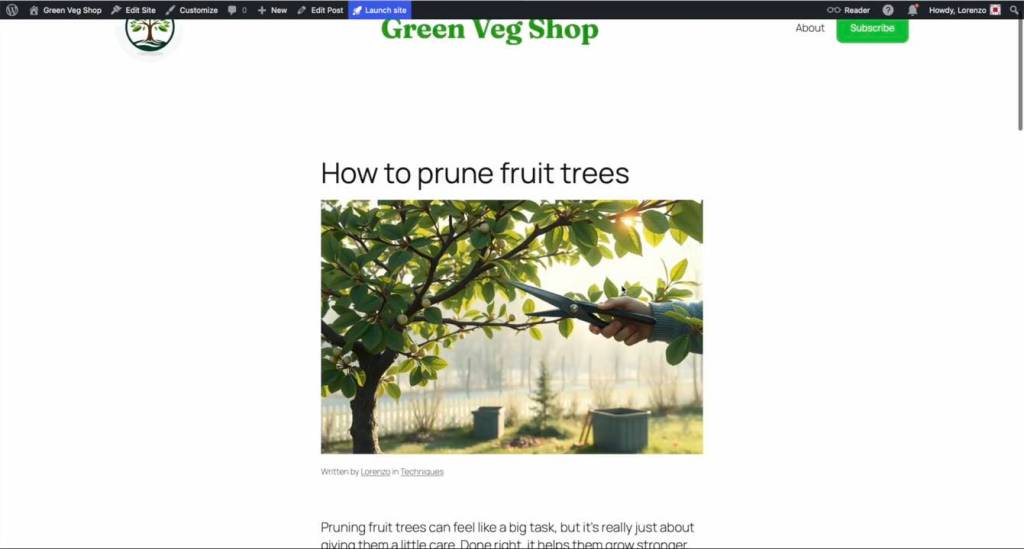
For the website we are creating, which is a gardening website, we will write a post about how to prune fruit trees. Here again, I’ll be using again the advantage of the AI image creation tools.
Also I’ll select – or create and add – a category for that post. A category is kind of a label for a content. It will become useful later when you want to arrange the posts through your website.
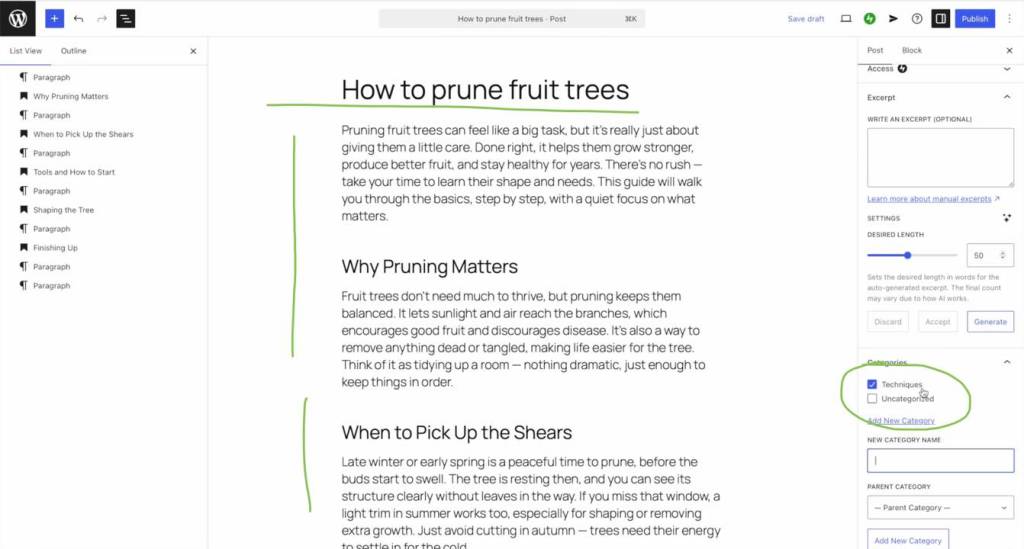
And this is the finished post, which is categorized under the “techniques” category that I decided for it:
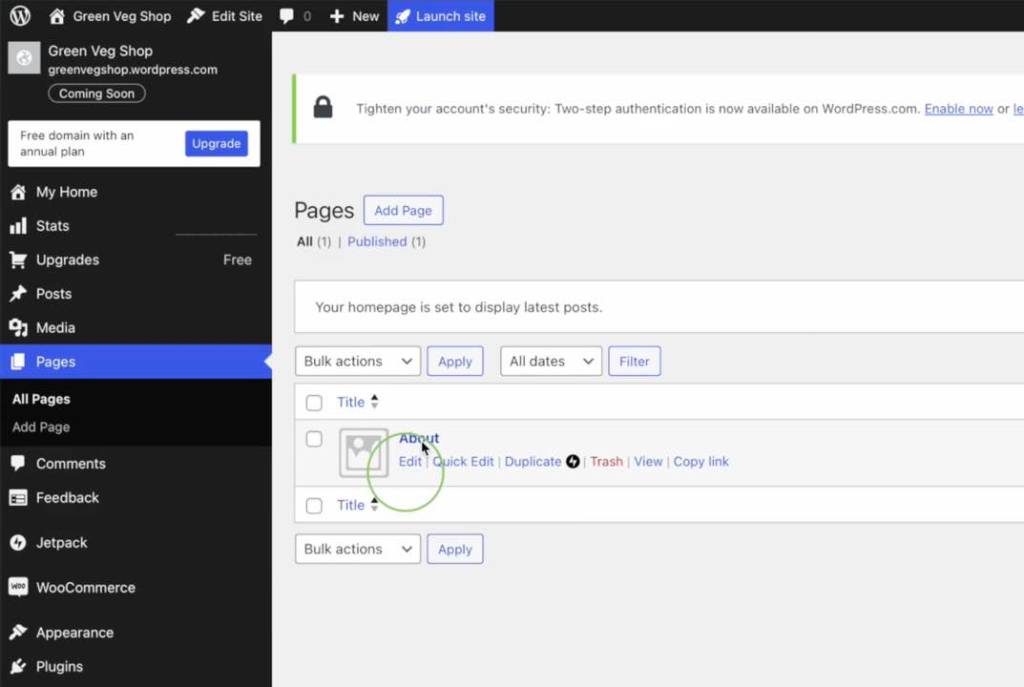
Modify and add pages
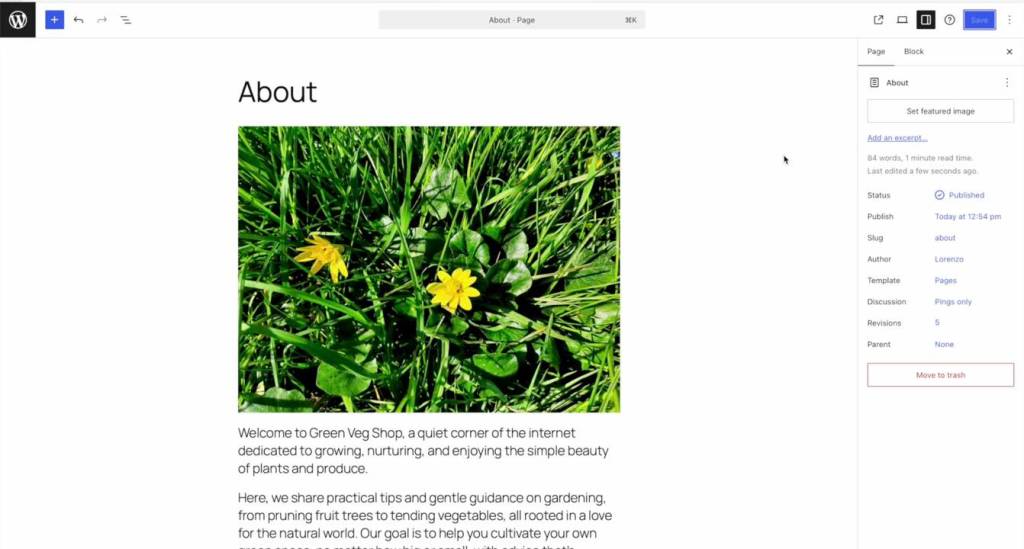
Now, as you can see, we know it’s time to add or customize a page. In this case we will modify the “About” page, which came already made with the theme. It needs, of course, to be personalized. We can do this simply by editing the page, in the page editor. Here again, we are modifying the content itself, not the underlying structure of a page.
And each website should also have a contact page, so we will conveniently add a new page. See how easy it is to add content by adding or modifying blocks and existing patterns, and modifying them and changing the settings to give it the appearance that you want:

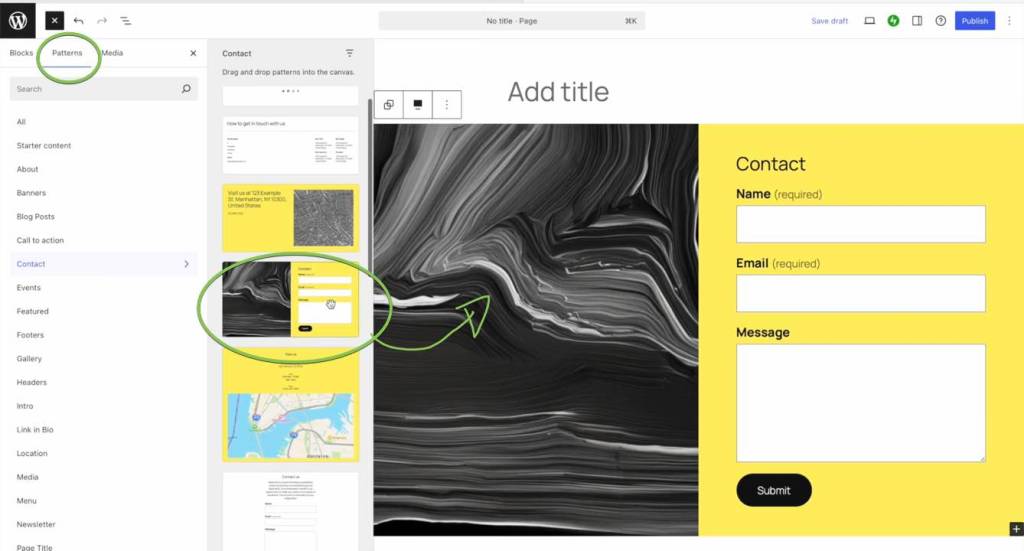

Notice also how the new page has already been added to the navigation menu on top.
Categories for posts, and the powerful “Query loop” block
Under the post tab in the dashboard, see that there is also the categories setting, where you can add categories for each post and modify existing ones. We will add a new category now.
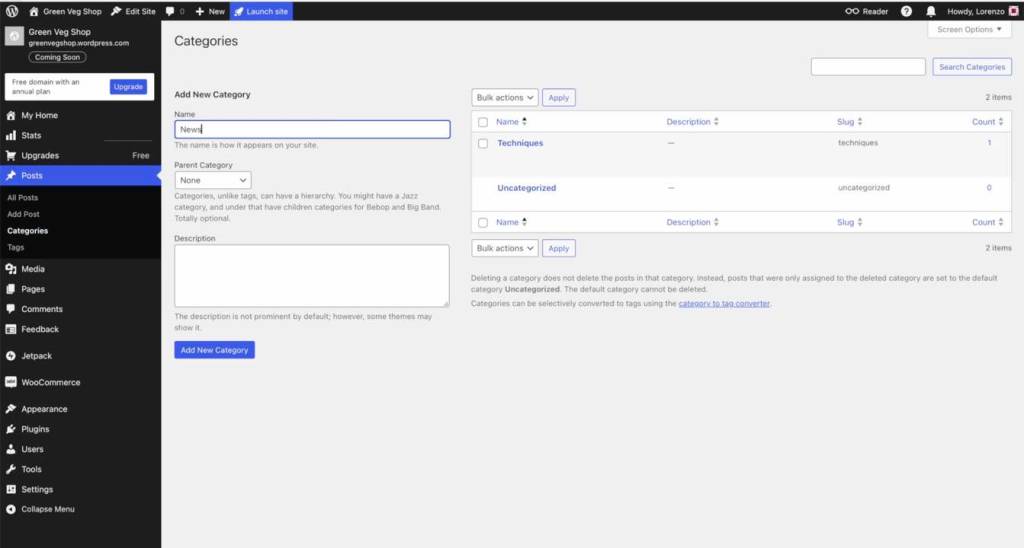
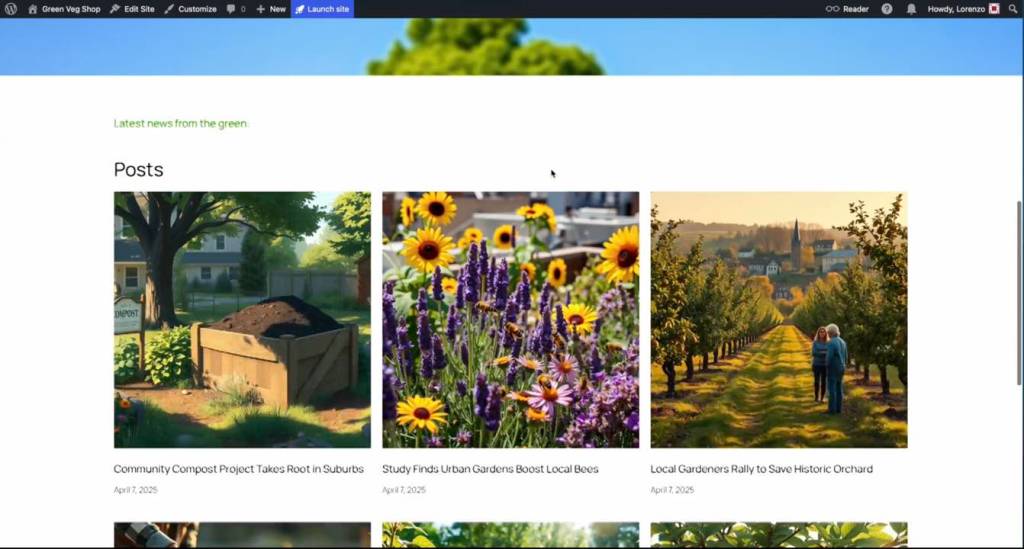
So when we write another post, we can choose a category that best suits it. This will come in handy when we want to arrange the content on our website. I’ll show this in a minute. In fact, I have populated the blog with more posts. I’m going to divide and display the posts according to their category.
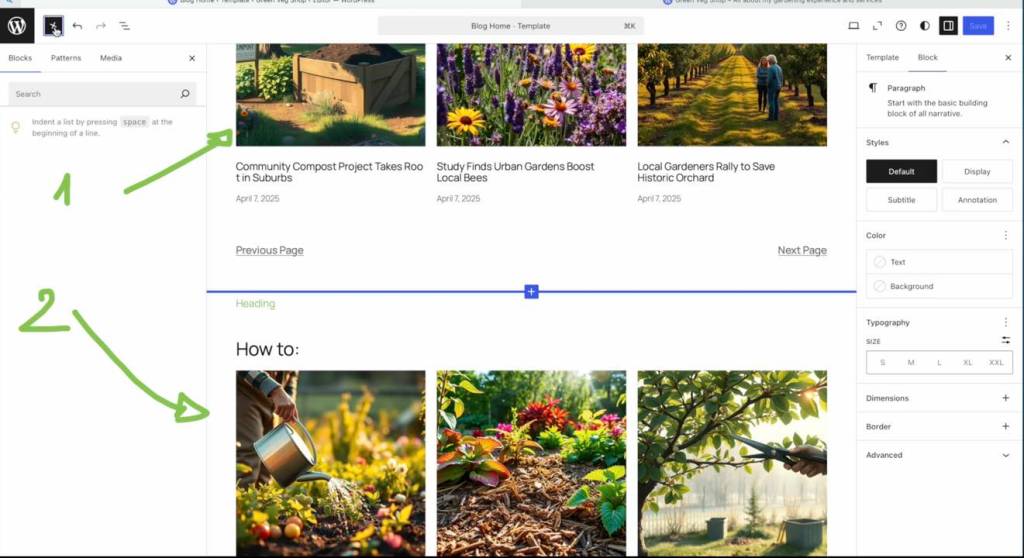
For doing so, I’m again going to edit the blog home template. Notice that there is a specific block that governs how posts show up, and is called the “query loop” (we already used it before when editing its appearance).
On the right in the settings of the query loop, under Query type select Custom, then you can specify which posts should appear. All you have to do is to specify the proper taxonomies, in other words, categories or other kinds of labels, that identify the posts.

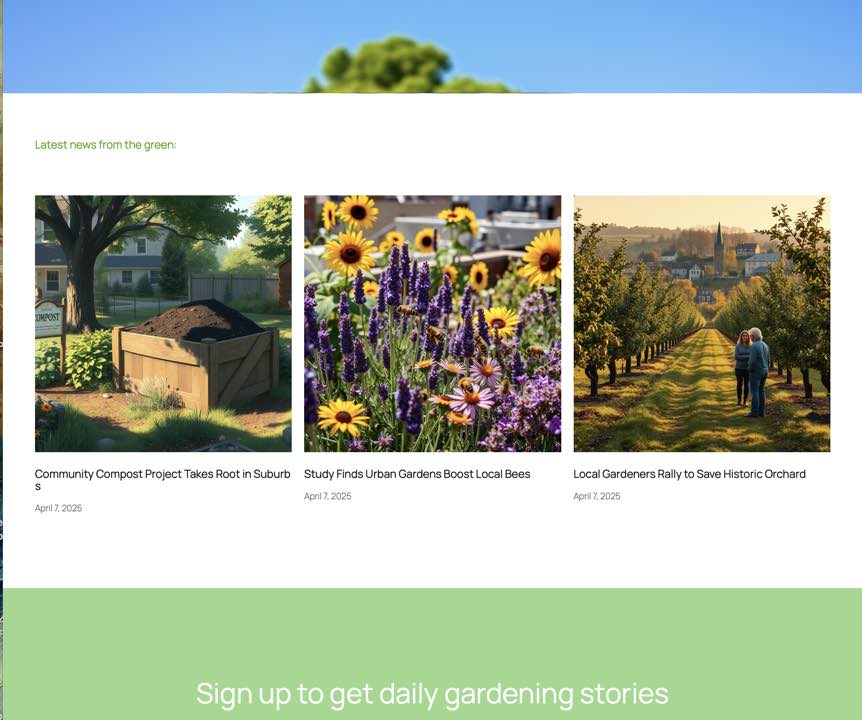
For example, if you want that a query loop block shows only the posts with the “news” category, select it.
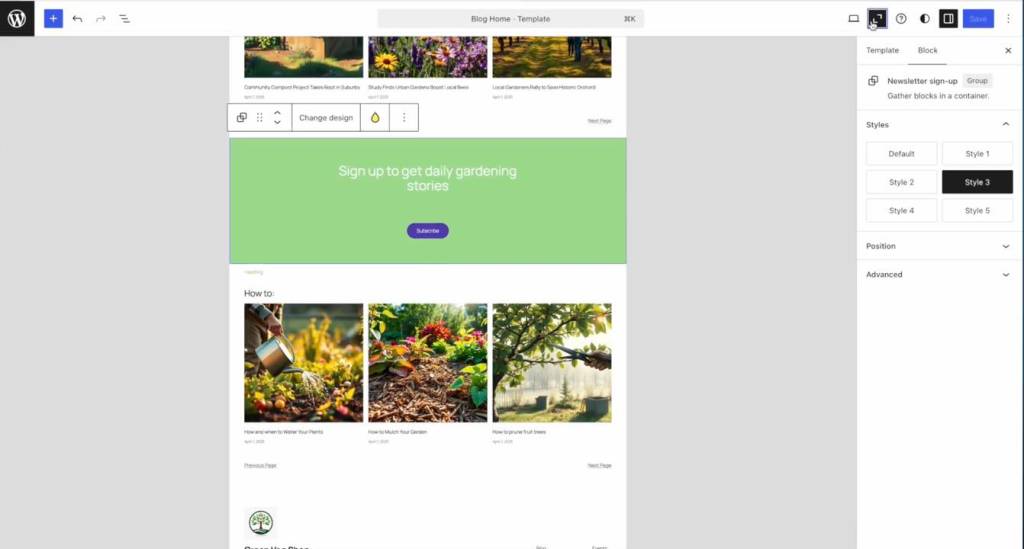
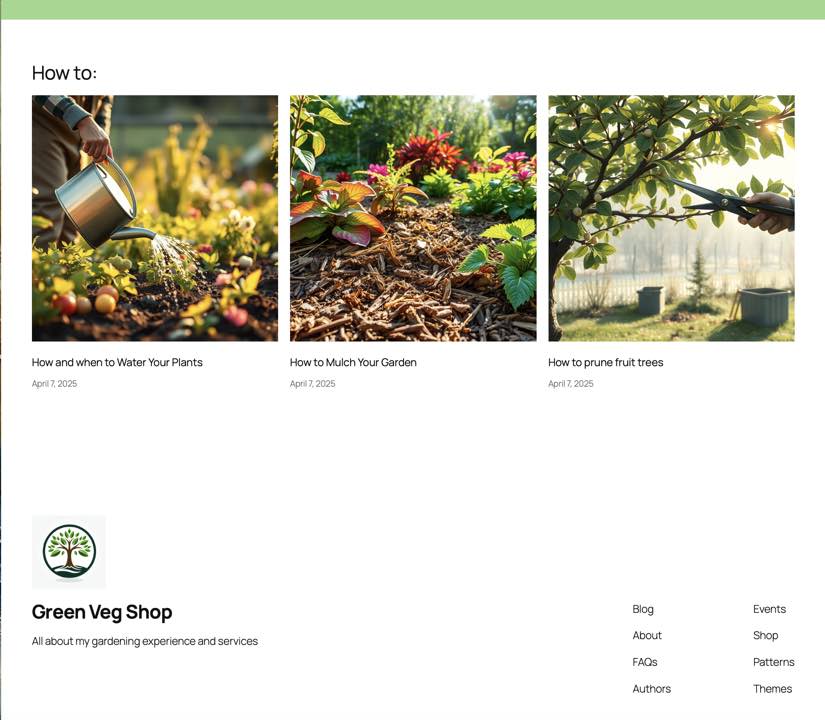
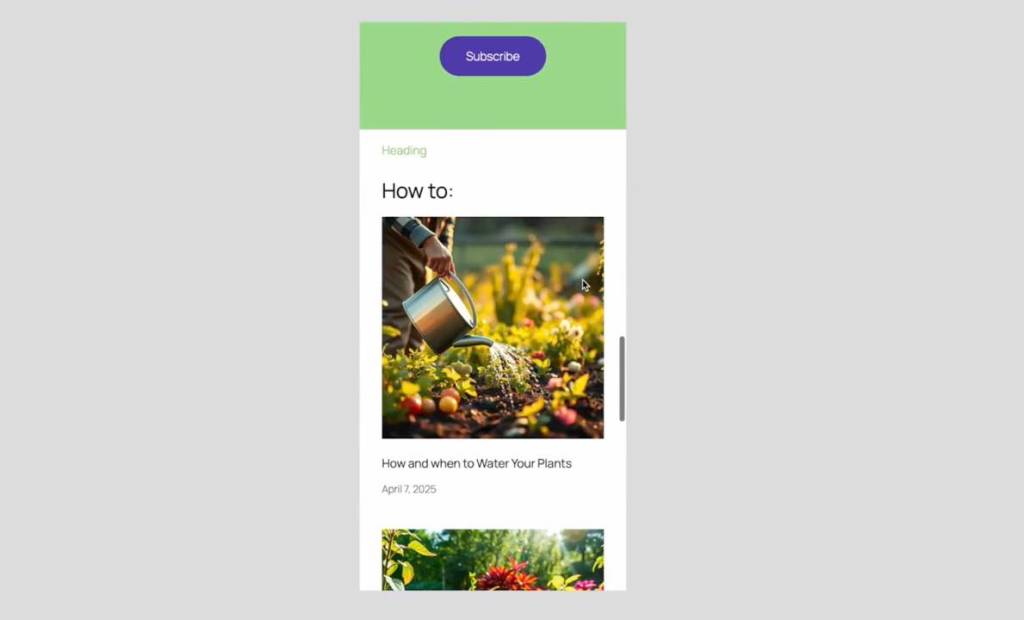
See that now I duplicate the block with the query loop and I select a different category to show only the posts labeled with the “technique” category, which will appear in another section or their website just under the previous one, this has the title “How to”, and it displays only the posts under the Techniques category:
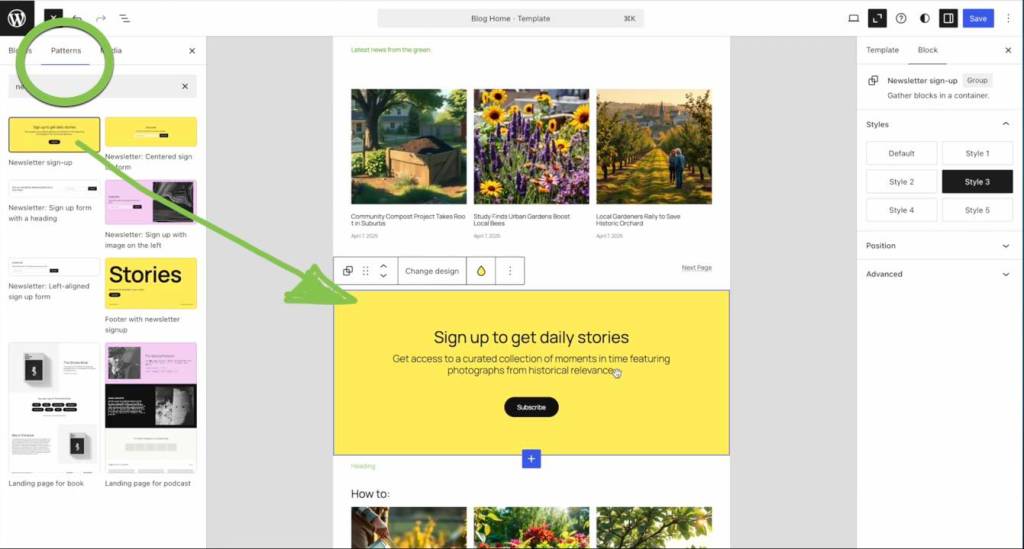
You can also conveniently add patterns and other parts that are already made, and you just have to customize as you prefer. For example, here I am adding a box to encourage visitors to subscribe to my website:
Congratulations! Your website is finished
And here it is, the almost finished website. As you can see, it has a nice, clean look on desktop and also on mobile:
There is really no limit to what you can create with WordPress, and as you can see, you don’t need to code at all. You can even add an e-shop integrated into your website.
Here’s just an example, but see how easy it is to integrate a marketplace inside your WordPress site:
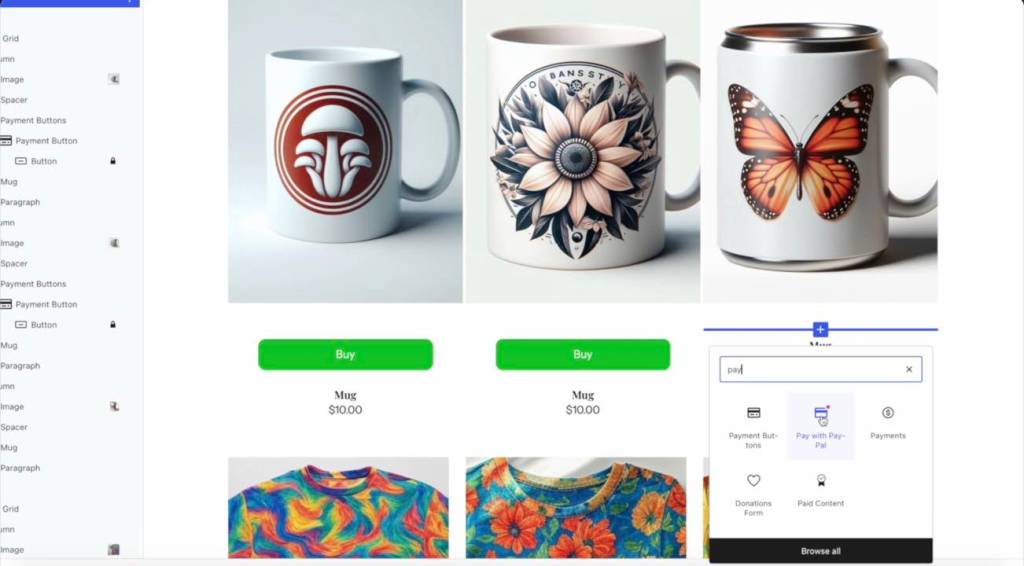
There are options for monetization, buttons for receiving payments, and everything is beautifully integrated in this wonderful WordPress.com managed hosting. Again, as I said, this guide is related to any website built with the WordPress.org software.
I think creating a website is an amazing opportunity to show off your passion and your personality to the world. I hope that my guide inspired you to create something unique and yours.
Thank you for following along, and let me know in the comments anything you want to know about website creation. Also, subscribe to my newsletter if you enjoyed this content.
Thanks for reading. See you soon.
Start your website today with WordPress.com 🚀 Link & Instructions:
WordPress.com is the perfect platform to launch your website or personal blog in just minutes, backed by reliable and secure hosting. With annual plans, you’ll also get a free domain name for the first year, so you can begin building your online presence right away.
Here’s how to get started in 2 simple steps:
- Visit WordPress.com through this link to explore the different plans.
- Choose the plan that best fits your needs and start creating your site today.
Don’t wait – the best time to grow your online project is now.


Leave a comment